What can we help you with?
Technical flooring, delivered directly
- ESD flooring, urethane cement, terrazzo, and polished concrete
- In-house W-2 installation crews and experienced field leadership
- National service coverage with project-specific staffing plans
- Testing, documentation, and defined project closeout
- Dedicated support for corporate procurement and multi-site contracting
Phone: +1 (844) 687-1961
ESD Floor Maintenance at a Glance
ESD flooring maintenance is a compliance task before it is a cosmetic one. Dirt, cleaner residue, and any film of wax or floor finish insulate the surface and push resistance out of the range an ANSI/ESD S20.20-2021 program requires, so a floor that looks clean can still fail its ANSI/ESD STM7.1-2020 resistance test. The regimen that protects the electrical function pairs routine ESD floor cleaning, using a pH-neutral, ESD-approved cleaner, with a standing ban on waxes, finishes, sealants, and high-pH or solvent chemistry, backed by resistance re-verification on a documented schedule. Craftsman Concrete Floors has installed and maintained industrial static-control floors since 1999 and supports facilities through resealing, repair, and re-verification when readings drift.
How to clean ESD flooring comes down to keeping the conductive surface exposed. Sweep or vacuum loose grit, scrub with a neutral ESD floor cleaner on a single-disc rotary machine at 150-300 RPM with a soft nylon brush or white pad, then extract with a wet vacuum or auto-scrubber. Nothing that leaves a film belongs in the program: no wax, no acrylic finish, no sealant, no degreasers or strippers, no abrasive black, green, blue, or grit pads. Each of those either insulates the surface or abrades the conductive media. The full protocol, the testing cadence, and the warning signs that call for the installer follow below.
| Topic | Detail |
|---|---|
| Cleaning | pH-neutral, ESD-approved cleaner from the manufacturer’s approved list; single-disc rotary 150–300 RPM, soft nylon brush or white pad; wet-vac or auto-scrubber extraction |
| Never Use |
|
| Compliance |
|
| Acceptance Bands | conductive below 1.0 × 10⁶ Ω; static dissipative 1.0 × 10⁶ to 1.0 × 10⁹ Ω; a footwear/flooring system used for personnel grounding below 100 V body voltage and below 1.0 × 10⁹ Ω system resistance under ANSI/ESD S20.20-2021 |
| Testing Cadence | Follow the facility’s documented compliance-verification schedule, with additional checks after changes that could affect floor performance. |
| Environment | 40–60% relative humidity supports static control in dry facilities |
| Service Area | in-house W-2 crews provide national service coverage; installing industrial flooring since 1999 |
The ESD Floor Cleaning Protocol
The work of cleaning ESD epoxy floors is simpler than most janitorial programs assume; the chemistry rules are what’s strict. Every step in the protocol serves one electrical goal: keep the engineered conductive surface in direct contact with shoes, casters, and grounding hardware. Grit abrades that surface, chemistry can coat it, and both failure modes read the same way on a meter, as rising resistance. The procedures below apply to poured epoxy and urethane ESD systems and follow the flooring manufacturer’s care documents wherever the two differ.
Initial Clean After Installation
Initial cleaning is timed to the system’s cure and the manufacturer’s written recommendation. Sweep or vacuum all loose debris, scrub with a pH-neutral cleaner on a single-disc rotary machine at 150-300 RPM with a soft nylon brush or white pad, then extract the solution with a wet vacuum or auto-scrubber. Rinse with clean water, vacuum again so no residue remains, and allow 1 to 2 hours of dry time. A dry buff with the same machine and pad is optional; never tilt or heel the machine into the coating.
Daily and Routine Cleaning
Daily care is dry soil removal plus neutral chemistry. Dust mop or vacuum every shift in traffic areas because tracked grit acts like sandpaper under foot and caster traffic. Damp mop or auto-scrub with a pH-neutral, ESD-approved cleaner from the flooring manufacturer’s approved-cleaner list, rinse with clean water so surfactant residue never accumulates into an insulating film, and spot-clean spills immediately with the same neutral chemistry. High-traffic zones take a weekly or biweekly deep clean on the rotary machine. Use dedicated, freshly laundered mop heads, and log every product that touches the floor in the ESD control plan so an auditor can trace the cleaning history.
What Never Goes on an ESD Floor
Wax, floor finish, and sealants will fail a compliant floor. A single coat of ordinary acrylic finish insulates the surface, and a dissipative floor rated 1.0×10⁶ to 1.0×10⁹ Ω can read above the 10⁹ Ω upper bound while looking showroom-perfect. High-pH and solvent-based cleaners stay off unless the flooring manufacturer approves the specific product in writing. Degreasers, floor strippers, general-purpose industrial cleaners, oil-treated dust mops, and abrasive black, green, blue, or grit pads are all off the list; the pads physically remove the conductive wear surface rather than coating it.
Resistance Re-Verification Under ANSI/ESD S20.20
Routine cleaning protects the floor’s electrical performance; periodic testing checks that it continues to meet the facility’s requirements. The facility’s compliance-verification plan defines the test methods, acceptance criteria and frequency. ESD TR53 provides procedures for recurring verification.
Test Methods and Acceptance Ranges
Three test methods carry the program. STM7.1 measures floor-material resistance, the reading that confirms conductive floors sit below 1.0×10⁶ Ω and static dissipative floors hold 1.0×10⁶ to 1.0×10⁹ Ω. STM97.1 measures system resistance, the floor, footwear, and person together as one ground path. STM97.2 measures body-voltage generation with a walking test; ANSI/ESD S20.20-2021 requires a footwear/flooring system used for personnel grounding to stay below 100 V. Which band a facility needs is a selection question answered on the conductive vs dissipative page; the maintenance question is whether this floor still reads inside the band it was installed and accepted to. Recurring verification as a managed service, with scheduled site visits and audit-ready reports, is covered on the ESD testing programs page.
Humidity and the Environment
Relative humidity between 40 and 60 percent supports static control in dry environments. Low humidity accelerates triboelectric charge generation on people and materials, which raises the load the floor and footwear system has to bleed off. A grounded ESD floor is engineered so its resistance does not swing with the weather the way sealed concrete does, but holding 40-60% RH keeps charge generation itself down and helps keep STM97.2 body-voltage readings inside the program limit during dry winter months.
Documentation That Survives an Audit
Every test cycle gets logged: date, test locations, the specific resistance readings, pass or fail status, and the technician’s initials. Review the prior year’s logs before testing to flag zones that trended toward a band limit, and confirm the meter is within calibration before the first reading, since an out-of-calibration meter invalidates the cycle. Measure resistance-to-ground at multiple points per room rather than one, because localized wear and contamination fail locally. Retain records for the period the ESD control plan requires, ideally tied to floor-plan schematics; those logs and the cleaning-product record together are the working ESD floor maintenance checklist an auditor asks for first.
Repair, Resealing, and Re-Verification
Drifting readings rarely mean a dead floor. In our experience out-of-spec readings trace to film buildup, localized wear, or a grounding fault, and each has a distinct fix. Diagnosis starts with STM7.1 testing to locate the actual cause; guessing is how sound floors get replaced.
Rising Resistance or Loss of Sheen
Film buildup from the wrong cleaner is the first thing we check when resistance rises, because it reverses with a manufacturer-approved deep scrub, no recoat required. If readings stay high after restoration cleaning and the wear surface shows loss of sheen, a reseal with the system’s own ESD topcoat can restore the band. The installer confirms with before-and-after STM7.1 readings so the fix is documented, not assumed.
Cracks, Gouges, and Delamination
Physical damage gets professional repair, not patching with a non-conductive filler that interrupts the ground plane. Cracks, gouges, and substrate delamination are cut out, primed, and rebuilt with the matching conductive system, and wear-through in traffic lanes takes a localized recoat that returns the zone to its specified class, confirmed by retest. Failures that trace back to the original installation, a skipped conductive primer or thinned ground-plane coat, are covered on the common installation mistakes page.
Inconsistent Readings Across Zones
Zone-to-zone inconsistency points at the ground path, not the coating. A broken ground strap or a painted-over ground connection makes a healthy floor read as failed, so the grounding grid gets inspected and verified back to the designated ground connection before any coating work is scoped. This is the highest-value diagnostic call to the installer: a grounding repair is a much smaller scope than a recoat once the fault is located. The installation process and installer pages cover how the ground plane is built and verified on new work.
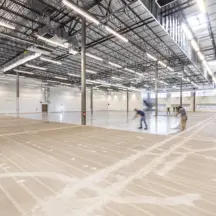
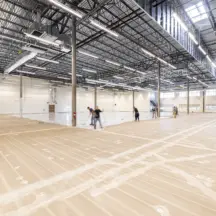
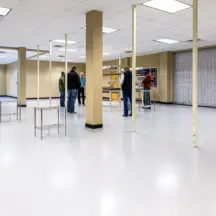
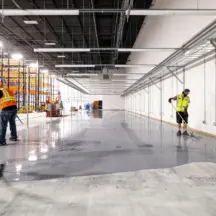
ESD Flooring Gallery

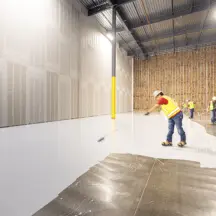
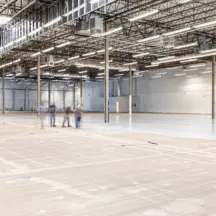
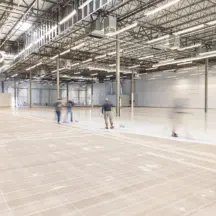
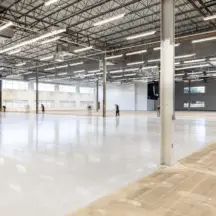
Frequently Asked Questions
Clean an ESD floor with a pH-neutral, ESD-approved cleaner and keep the conductive surface exposed. Dust mop or vacuum daily to remove grit that abrades the wear surface, damp mop or auto-scrub with the neutral cleaner, then rinse with clean water so surfactant residue never builds into an insulating film. Never apply wax, acrylic finish, or sealant; a single coat can push a dissipative floor above the 1.0×10⁹ Ω upper bound and fail it under ANSI/ESD S20.20 while it still looks clean.
The safe chemistry for ESD flooring maintenance is a neutral-pH cleaner the flooring manufacturer has approved as leaving no insulating film. High-pH cleaners, solvents, degreasers, and floor strippers stay off the floor unless the manufacturer approves a specific product in writing. Use dedicated, freshly laundered mop heads and pads, because residue carried over from other chemicals accumulates like a slow-forming wax layer, and confirm any new product against the approved-cleaner list before it touches the floor.
No. Wax, floor finish, and sealants insulate the surface and defeat the floor’s electrical function; a waxed dissipative floor can read above the 1.0×10⁹ Ω band limit and fails STM7.1 testing while looking perfect. If finish has already been applied, recovery follows the flooring manufacturer’s approved removal procedure, then re-testing to STM7.1 before the zone returns to service.
Follow the schedule in your facility’s ESD compliance-verification plan. Set the interval using operating conditions, wear and previous test results. Review the need for additional testing after changes to cleaning products, recoating, repairs or significant wear.
Resistance drifts with contamination, wear, and cleaning history, and a drifted floor can be restored without replacement when the cause is film, local wear or a ground connection. Film buildup from the wrong cleaner reverses with a manufacturer-approved deep scrub, wear-through in traffic lanes takes a localized recoat, and a broken or painted-over ground connection mimics floor failure but is fixed at the connection rather than the coating. Diagnosis starts with STM7.1 testing to locate the actual cause before any repair is scoped.
A working ESD flooring maintenance checklist has four parts: daily grit removal with pH-neutral mopping, a standing ban on waxes and finishes, 40-60% relative humidity control in dry environments, and resistance re-verification on the program’s documented schedule. Each test cycle logs the date, test locations, the readings, pass or fail status, and the technician, with records retained for the period the ESD control plan requires.
Craftsman supports installed ESD floors nationwide through directly employed W-2 crews. Services include cleaning-protocol review, localized recoats, grounding-fault repair, and scheduled re-verification with documented resistance reports according to the executed scope. Personnel and equipment are assigned companywide through a project-specific plan based on geography, schedule, technical requirements, crew experience, availability, facility requirements, equipment needs, and concurrent workload. Craftsman’s offices are service and accountability points, not fixed crew or equipment origins. Each proposal identifies the staffing, equipment, mobilization, travel assumptions, testing scope, and schedule for the actual facility.
ESD Flooring Maintenance Knowledge Center
Maintenance & Troubleshooting
Compliance Requirements & Testing
Systems & Selection
Installation and verification services
Test conditions, grounding and records
Manufacturer ESD Flooring Systems
Case Studies
Craftsman Publishes 2026–2027 ESD Flooring Technical Guide
ESD Epoxy Flooring Case Study: 34,000 SF Dallas, TX