Project Gallery
Stained concrete is a common residential installation, but to keep it looking good requires periodic maintenance.
In this blog post, we’ll show you how we restored an acid-stained floor that was installed nearly two decades ago.
Over its life, this floor has received little to no maintenance. As a rule of thumb stained concrete floors should be inspected by a decorative concrete professional every three to five years.
Concrete Floor Damage
As you can see, this floor has significant damage. We’re going to break the damage down into a few categories:
Failed Concrete Sealer
The most significant issue with this floor is that the concrete sealer has worn off of its surface. This failure has caused wear patterns in high traffic areas and an overall chalky appearance.
A properly sealed concrete floor should have a vibrant, uniform appearance. Dullness or chalkiness in high traffic areas is an indicator that your floor should be inspected by a professional.
Incorrect Concrete Sealer
This floor originally used a type of floor wax as a sealant. Floor waxes aren’t sufficiently durable for concrete floors. We recommend a high-quality water-based polyurethane sealer for residential stained concrete applications.
TapeLines
Applying tape of any kind to a concrete floor can damage its surface. While applications of tape for short periods of time may not cause damage, tape left for weeks certainly will. Floors with worn sealers will damage more easily and require more costly repairs.
On this specific floor, there are tapelines everywhere. These tapelines are a result of protective coverings such as painter’s paper or ramboard being taped to the floor for an extended period of time.
Protective coverings should never be taped directly to any kind of decorative concrete floor. See our page on how to cover a concrete floor for protective covering installation details.
Low-Quality Stained Concrete Installation
While this floor was installed during the initial construction process, a lot of its details appear to be an afterthought. The proper time to install a decorative concrete floor is at the start of the construction process, sometimes before framing.
How can we tell that this flooring install was an afterthought?
The 45-degree saw-cut, a very common feature on this style of floor, was cut after the house was framed. This is never the correct time to execute this install.
Installing saw cuts after framing necessitates an awkward border around the parameter of every room in the house, as the saw cannot cut all the way to a stud wall. While this is not something that can be repaired now, it is always ideal to saw-cut a slab prior to framing.
Another clue is the inconsistent application of acid stain around the house. While the majority of the floor looks properly stained, the perimeter of every room had less stain than the center. This is generally due to less surface preparation around the edges. A properly installed stained concrete floor should have consistent color intensity all the way to the edge of the slab.
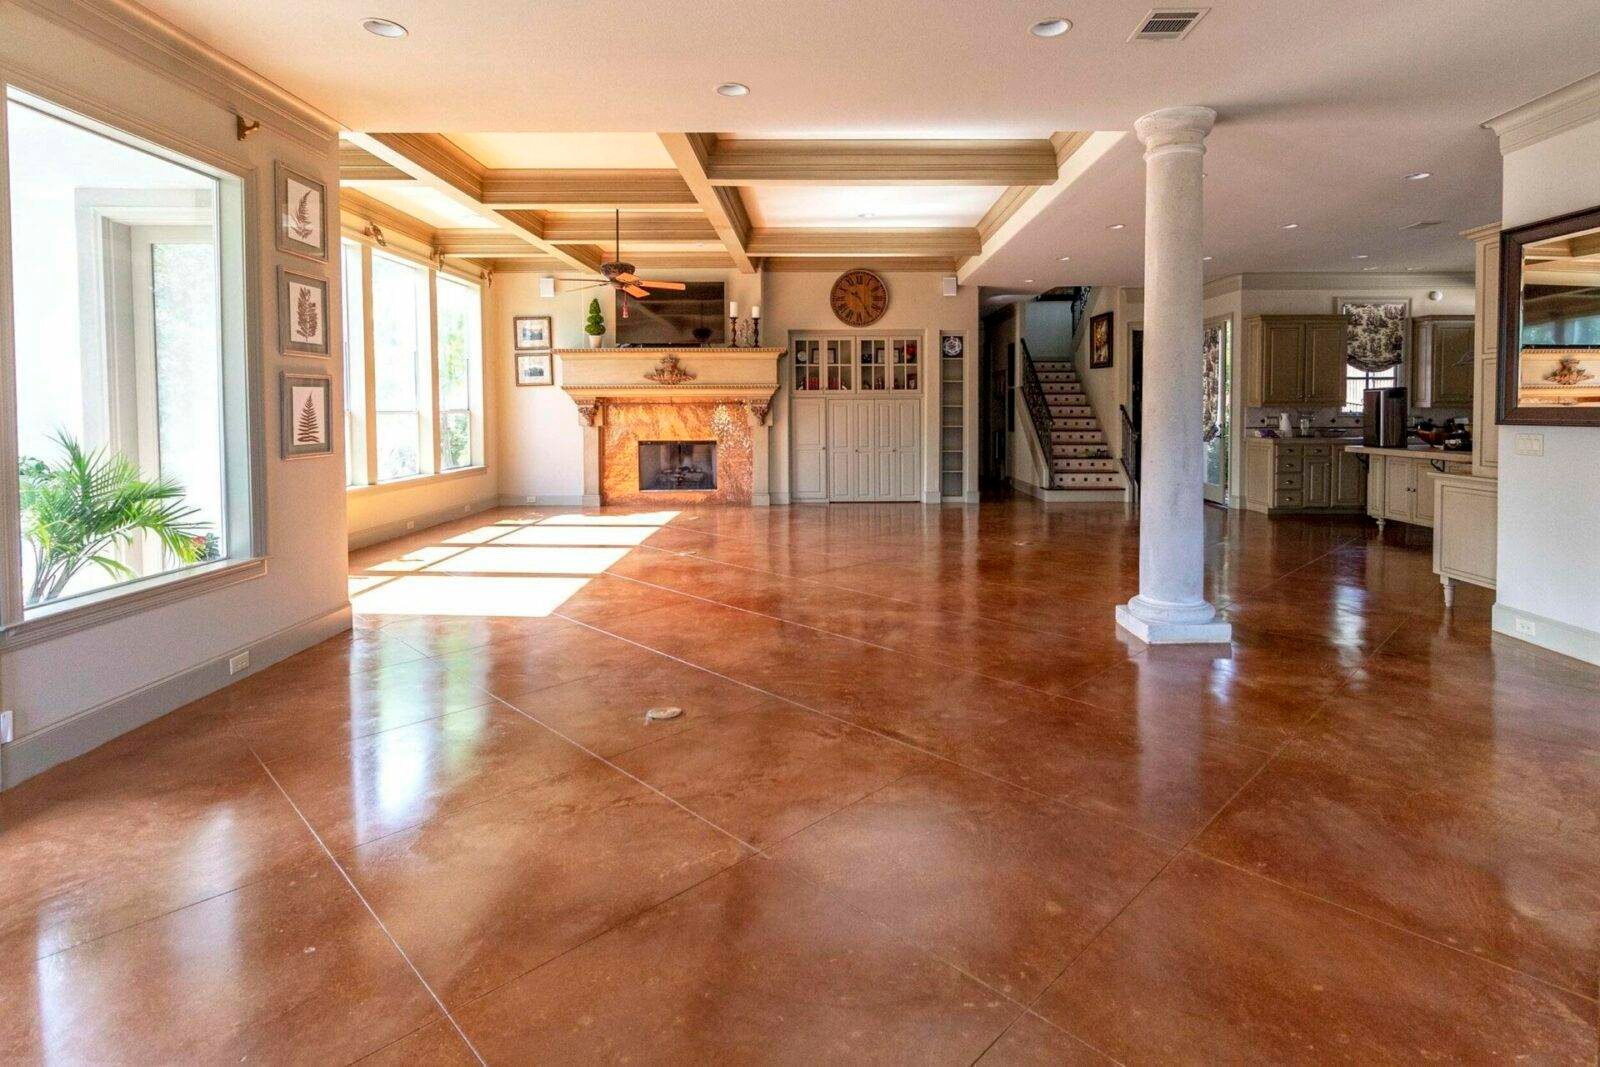
After Gallery
Here’s how we repaired this badly damaged stained concrete floor:
Sanding the Concrete Floor
To remove old floor wax and other surface contamination the concrete floors were sanded with 80 grit sandpaper on a swing buffer. This process was done with a light mist of water on the floor to prevent any airborne dust. The stained floor was then scrubbed with a small floor scrubber.
Areas with tape lines were treated with a light solvent to remove any adhesive residue and then additionally sanded with a standard palm sander. To properly remove the line, the sanded area had to significantly exceed the width of the tape line. As a consequence, this entire area will have less intensity of stain color than the surrounding areas. A faux finishing technique will be used to blend these areas with the remainder of the floor.
Matching the Stain Color
Acid-stained concrete floors gain their color through a chemical reaction. Using acid stain to re-stain this floor would most likely darken the color significantly, so acetone-borne concrete dyes were used to repair areas with faded color. For this project, three different shades of acetone-based concrete stains (brown, tan, and red) were used.
Applying the Acetone Dye
The acetone-borne concrete stain is applied to mimic the mottled appearance of the acid-stained floor. First, a base coat of tan concrete stain is uniformly applied to the faded areas of the floor. This is followed by inconsistent applications of brown and red. The topcoat stains are dabbed and blotted into the floor with microfiber towels. Small brushes and q-tips are used to emulate the lines left on the floor by a power trowel. The whole goal of this process is to seamlessly blend the damaged areas of the floor with the surrounding acid stain.
Applying High-Quality Concrete Sealer
The final step in our restoration process is to apply a suitable concrete sealer. For this job, we used Kemiko’s Clear-A-Thane sealer. It’s a water-based urethane sealer designed to treat acid-stained floors and offers tons of scratch resistance and all-around durability.
The sealer is sprayed on the floor with a high-pressure pump-up sprayer and then rolled smooth with a 1/4” nap paint roller.
It’s important to properly clean the floor before sealing, ideally with a specialized floor scrubber. If the floor has saw cuts, special attention should be paid to make sure the cuts are clear of any debris that might become trapped in the sealer.
Looking for more Information About Stained Concrete Floors?
Our stained concrete page has resources and galleries to help you learn more about stained concrete floors. As always, give us a call for a free consultation.